•Web Client Management in VERTEX provides a centralized way to monitor and control all devices connected through Web View from a single window.
•Users can quickly access key Web Client properties
•VERTEX also supports efficient scaling and organization of multiple Web Clients.
Adding a Web Client to your project
Go to MAIN MENU > CREATE > Tools > Web Client
Accessing the Web Client Management Window
Go to MAIN MENU > WINDOWS > TOOL > Web Client Management
Workflows
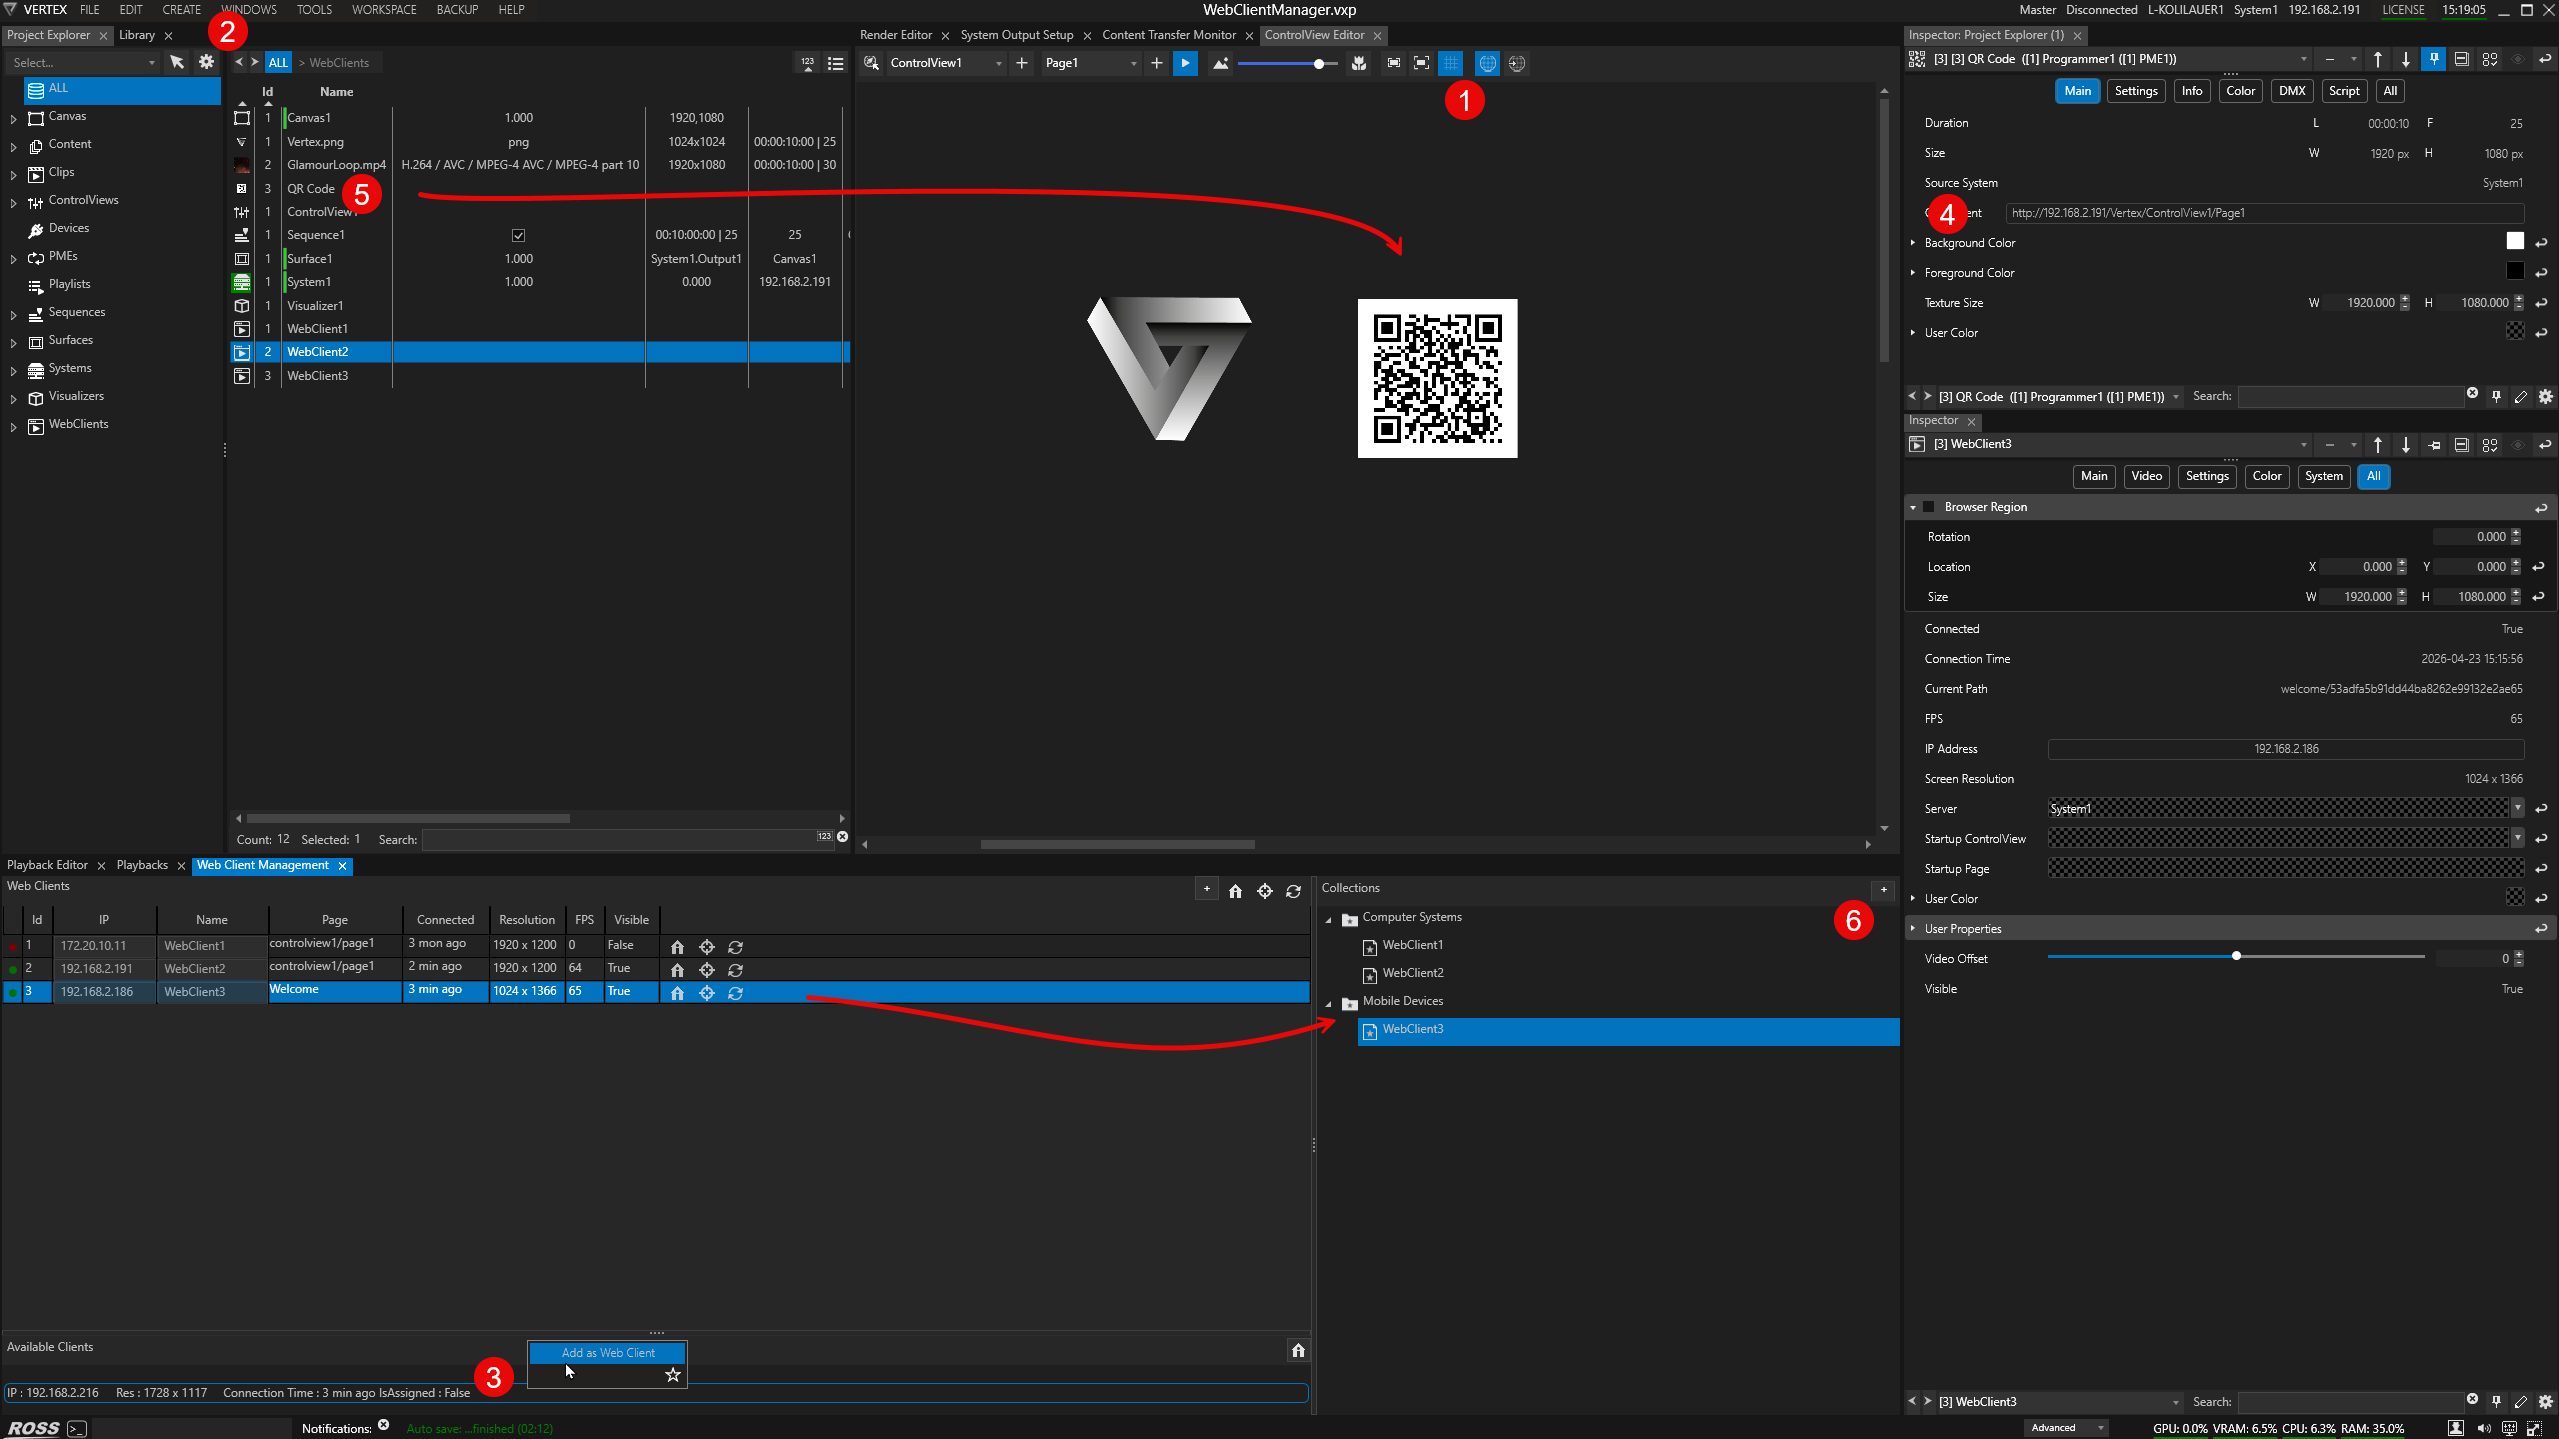
Use WebView to easily add your first web client to your Vertex project:
1.Go to Control View Editor and enable Web View
Click Open in Browser
2.Go to MAIN MENU > WINDOWS > TOOL > Web Client Management
This opens the Web Client Management window
3.Your browser will appear as a web client device in WebClient Management status bar.
Access its context menu (right-click) to add it as a web client to your project.
Prepare Web View's webpage output for easier addition of further web clients by a QR code scan:
4.Switch to your system's browser app
Copy URL
Switch back to VERTEX
Go to MAIN MENU > CREATE > CONTENT > QR Code
Inspect and paste the URL to the property QR Content
5.Drag QR Code into Control View Editor (create image control)
Scan the displayed QR code with smart phone or tablet connected to local network and access the URL
The new device will then appear in the Web Client Management window's status bar.
Add it as a new web client via context menu (repeating step 3)
Organizational Tools for Web Clients
6.Go to WebClient Management > Collections and click the add button (+ icon)
Drag individual web clients to a Collection for easy organizing tasks (i.e. by content, location or function)
Window Overview

1.Columns - web client properties:
Connection status LED, Id, IP address, Name, Page (Control View), Connected - time elapsed since last connection, Resolution, Visibility (= is browser topmost?)
2.Buttons column:
Welcome page, client will display IP addresses of client and server, as well as client name and connection status
Target, sends client to its default Control View Startup Page
Refresh browser
3.Global buttons:
Add web client, send all to welcome page, send all to startup page, refresh all
4.Web client context menu:
Welcome page
Startup Page
Set Startup Path
Send to other page...
Refresh Browser
Delete Web Client
5.Available Clients panel:
Lists all clients that accessed VERTEX webserver. Enables users to add clients to the project.
Home button sends available web clients to the Welcome Page
6.Collections panel - organizational tool for web clients
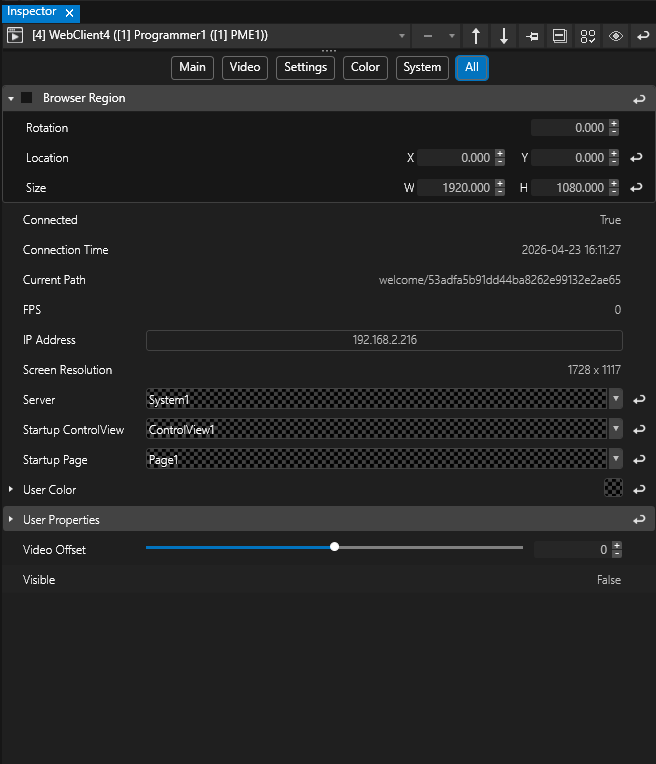
Web Client Inspector
|
Browser Region |
Enable this parent property to adjust how Web View is displayed on individual web clients regarding Rotation, Location and Size. |
Connected |
Connection status: true or false |
|
Connection Time |
Date & time since last connection |
|
Current Path |
Shows the path or page this web client is currently connecting to. |
|
FPS |
Shows the web client's current video frame rate. |
|
IP Address |
Client's IP addresses are automatically cached when a client connects to VERTEX web server. Alternatively, users can enter and edit IP addresses manually after adding a "blank" Web Client. |
|
Screen Resolution |
Shows the client's display resolution. |
|
Server |
Dropdown selection for the VERTEX system hosting the web server. |
|
Startup Control View |
Dropdown selection for the particular Control View item the client is routed to at startup. |
|
Startup Page |
Page selection within Control View selected above |
|
User Color/ User Properties |
See User Properties |
|
Video Offset (in ms) |
Allows users to compensate latencies for synchronous video playback between multiple web clients. |
|
Visible |
Visibility status - whether the browser is topmost or not on the web client's screen. |